Fairphone 4 unofficial getting started guide
Updated 2023 January 1
Copyright © 2023 T D Evans
Fairphone is a trademark of Fairphone B.V.
Android is a trademark of Google LLC.
All trademarks are the property of their respective owners.
This work is licensed under a Creative Commons Attribution-ShareAlike 4.0 International License.
Table of Contents
Introduction
This document provides some information for getting started with the Fairphone 4, running Android 11.
This is an unofficial document, provided as-is in the hope that it may be useful. This document has not been produced by Fairphone and is not endorsed by Fairphone. Fairphone are not responsible for any errors or inaccuracies in this document.
The Fairphone 4 ships with a "Quick Start Guide" in the form of a folded sheet of paper. One side of the guide has general information with URLs for accessories, recycling, Android set up and warranty. The other side has four columns of instructions in the form of infographics.
The guide can be downloaded as a PDF at:
support.fairphone.com/hc/en-us/article_attachments/4409017610001/QuickStartGuideEU2021.pdf
This document is intended to complement the Quick Start Guide.
Physical setup
This section describes basic physical setup. Upgrading and repairing the phone is out of scope.
Note that the Fairphone 4 supports the use of an e-SIM instead of, or in addition to, a physical SIM card. The use of e-SIMs is not described here, the provider’s documentation will need to be consulted.
Removing and replacing the back cover
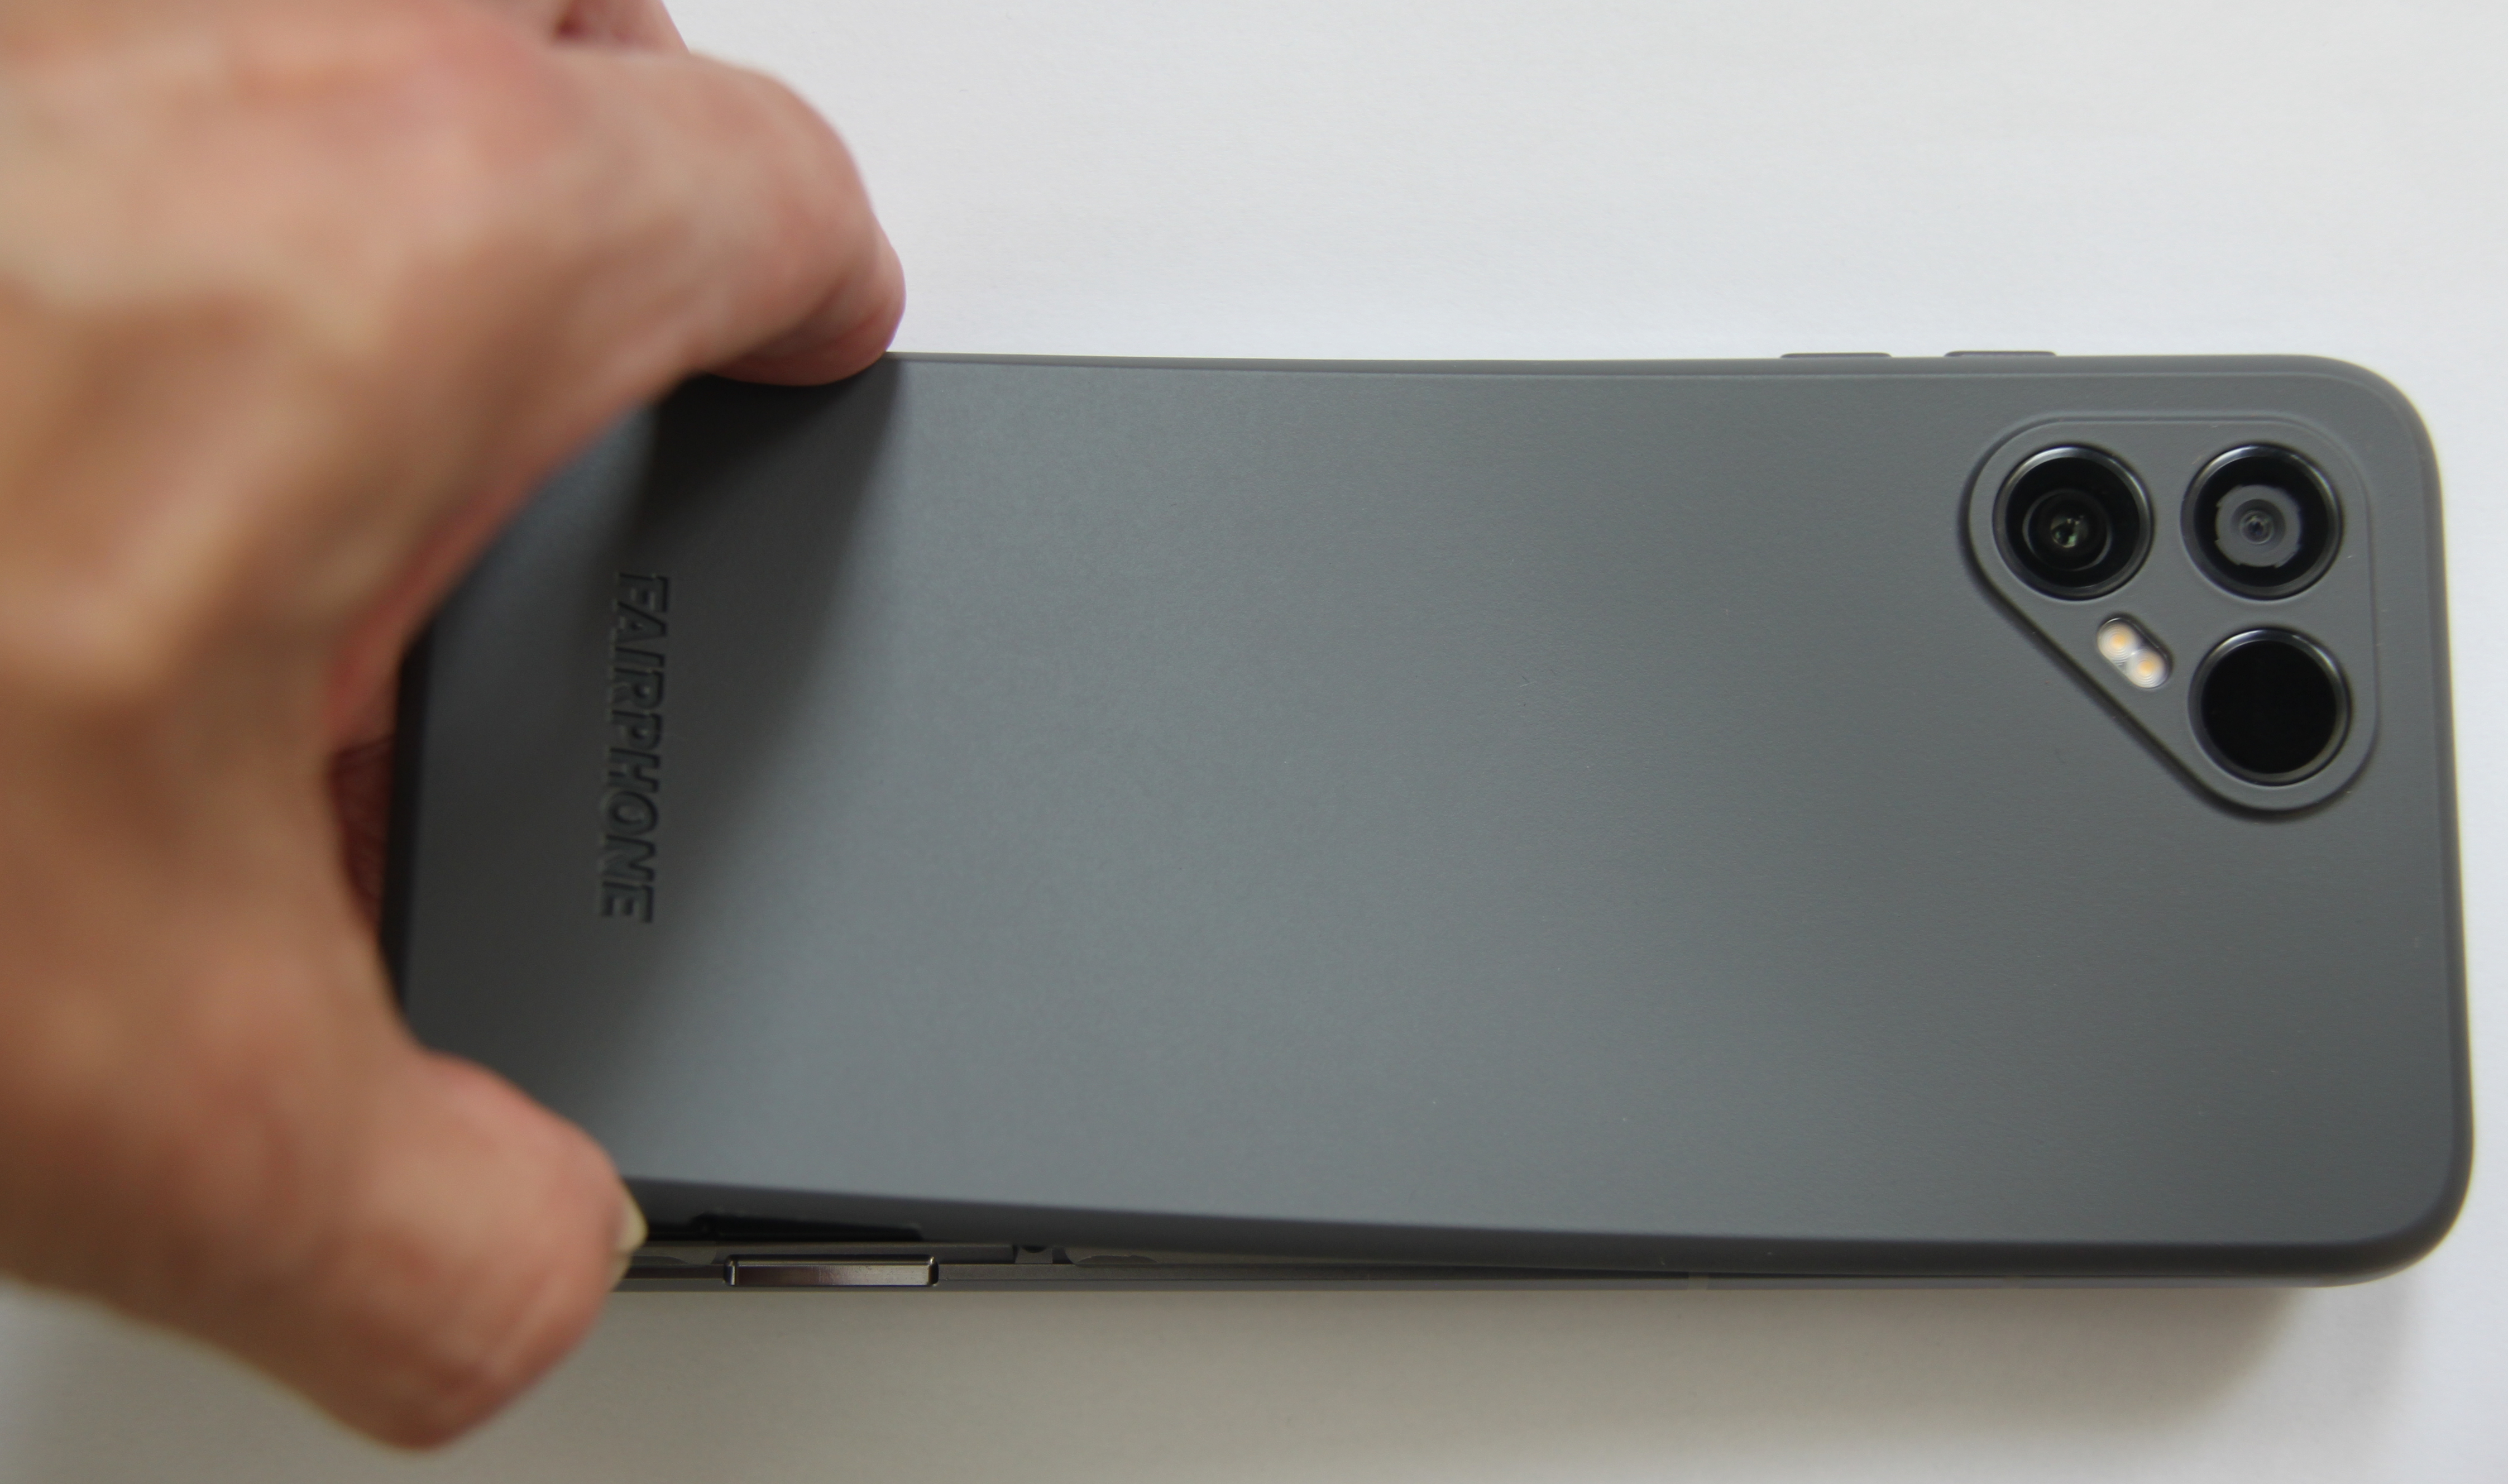
Many devices and traditional phones have covers that slide or lift off; with these devices there is often a small catch or button to release the cover and allow it to be removed. The cover on the Fairphone 4 is different. The small notch does not contain a button or catch to release the cover; it is simply a point to allow the cover to be gripped. The back cover is flexible and needs to be prised off.
To remove the cover, use the notch to start levering the cover away from the phone. Working from that point move around the phone pulling more of the cover away. The flexibility of the cover will allow it to be pulled from the phone. There are sixteen catches around the cover that secure it to the phone; as each of these disconnects there is a snapping sound. The author thought the sound was similar to that of breaking plastic, but this is normal. It is worth noting that it is possible to purchase replacement covers.
Figure 1. Prising off the cover

Replacing the back cover is the opposite procedure to removing it. Start securing the back cover at one of the catches opposite the notch and work around the edge pushing the catches back in place until the cover is secured. Ensure that all the catches have engaged back on to the phone.
Removing and replacing the battery
Once the cover has been removed, the battery is exposed and is the large rectangular component that occupies most of the space. There is a small notch in the component at the bottom of the phone that allows the battery to be levered up and out of the phone. Once the battery has been levered up it is simply lifted out of the phone.
Once the battery has been removed, the SIM and Micro SD slots are exposed.
Looking at the underside of the battery, the four slots for the power connectors can be seen.
To replace the battery, ensure that the power connector slots are facing down and at the top of the phone. Insert the battery at the top first and lower in to the compartment ensuring that it does not foul the SIM or Micro SD cards. If the battery presses on the SIM or Micro SD cards, lift the battery up and ensure they are fully slotted in.
SIM and SD slots
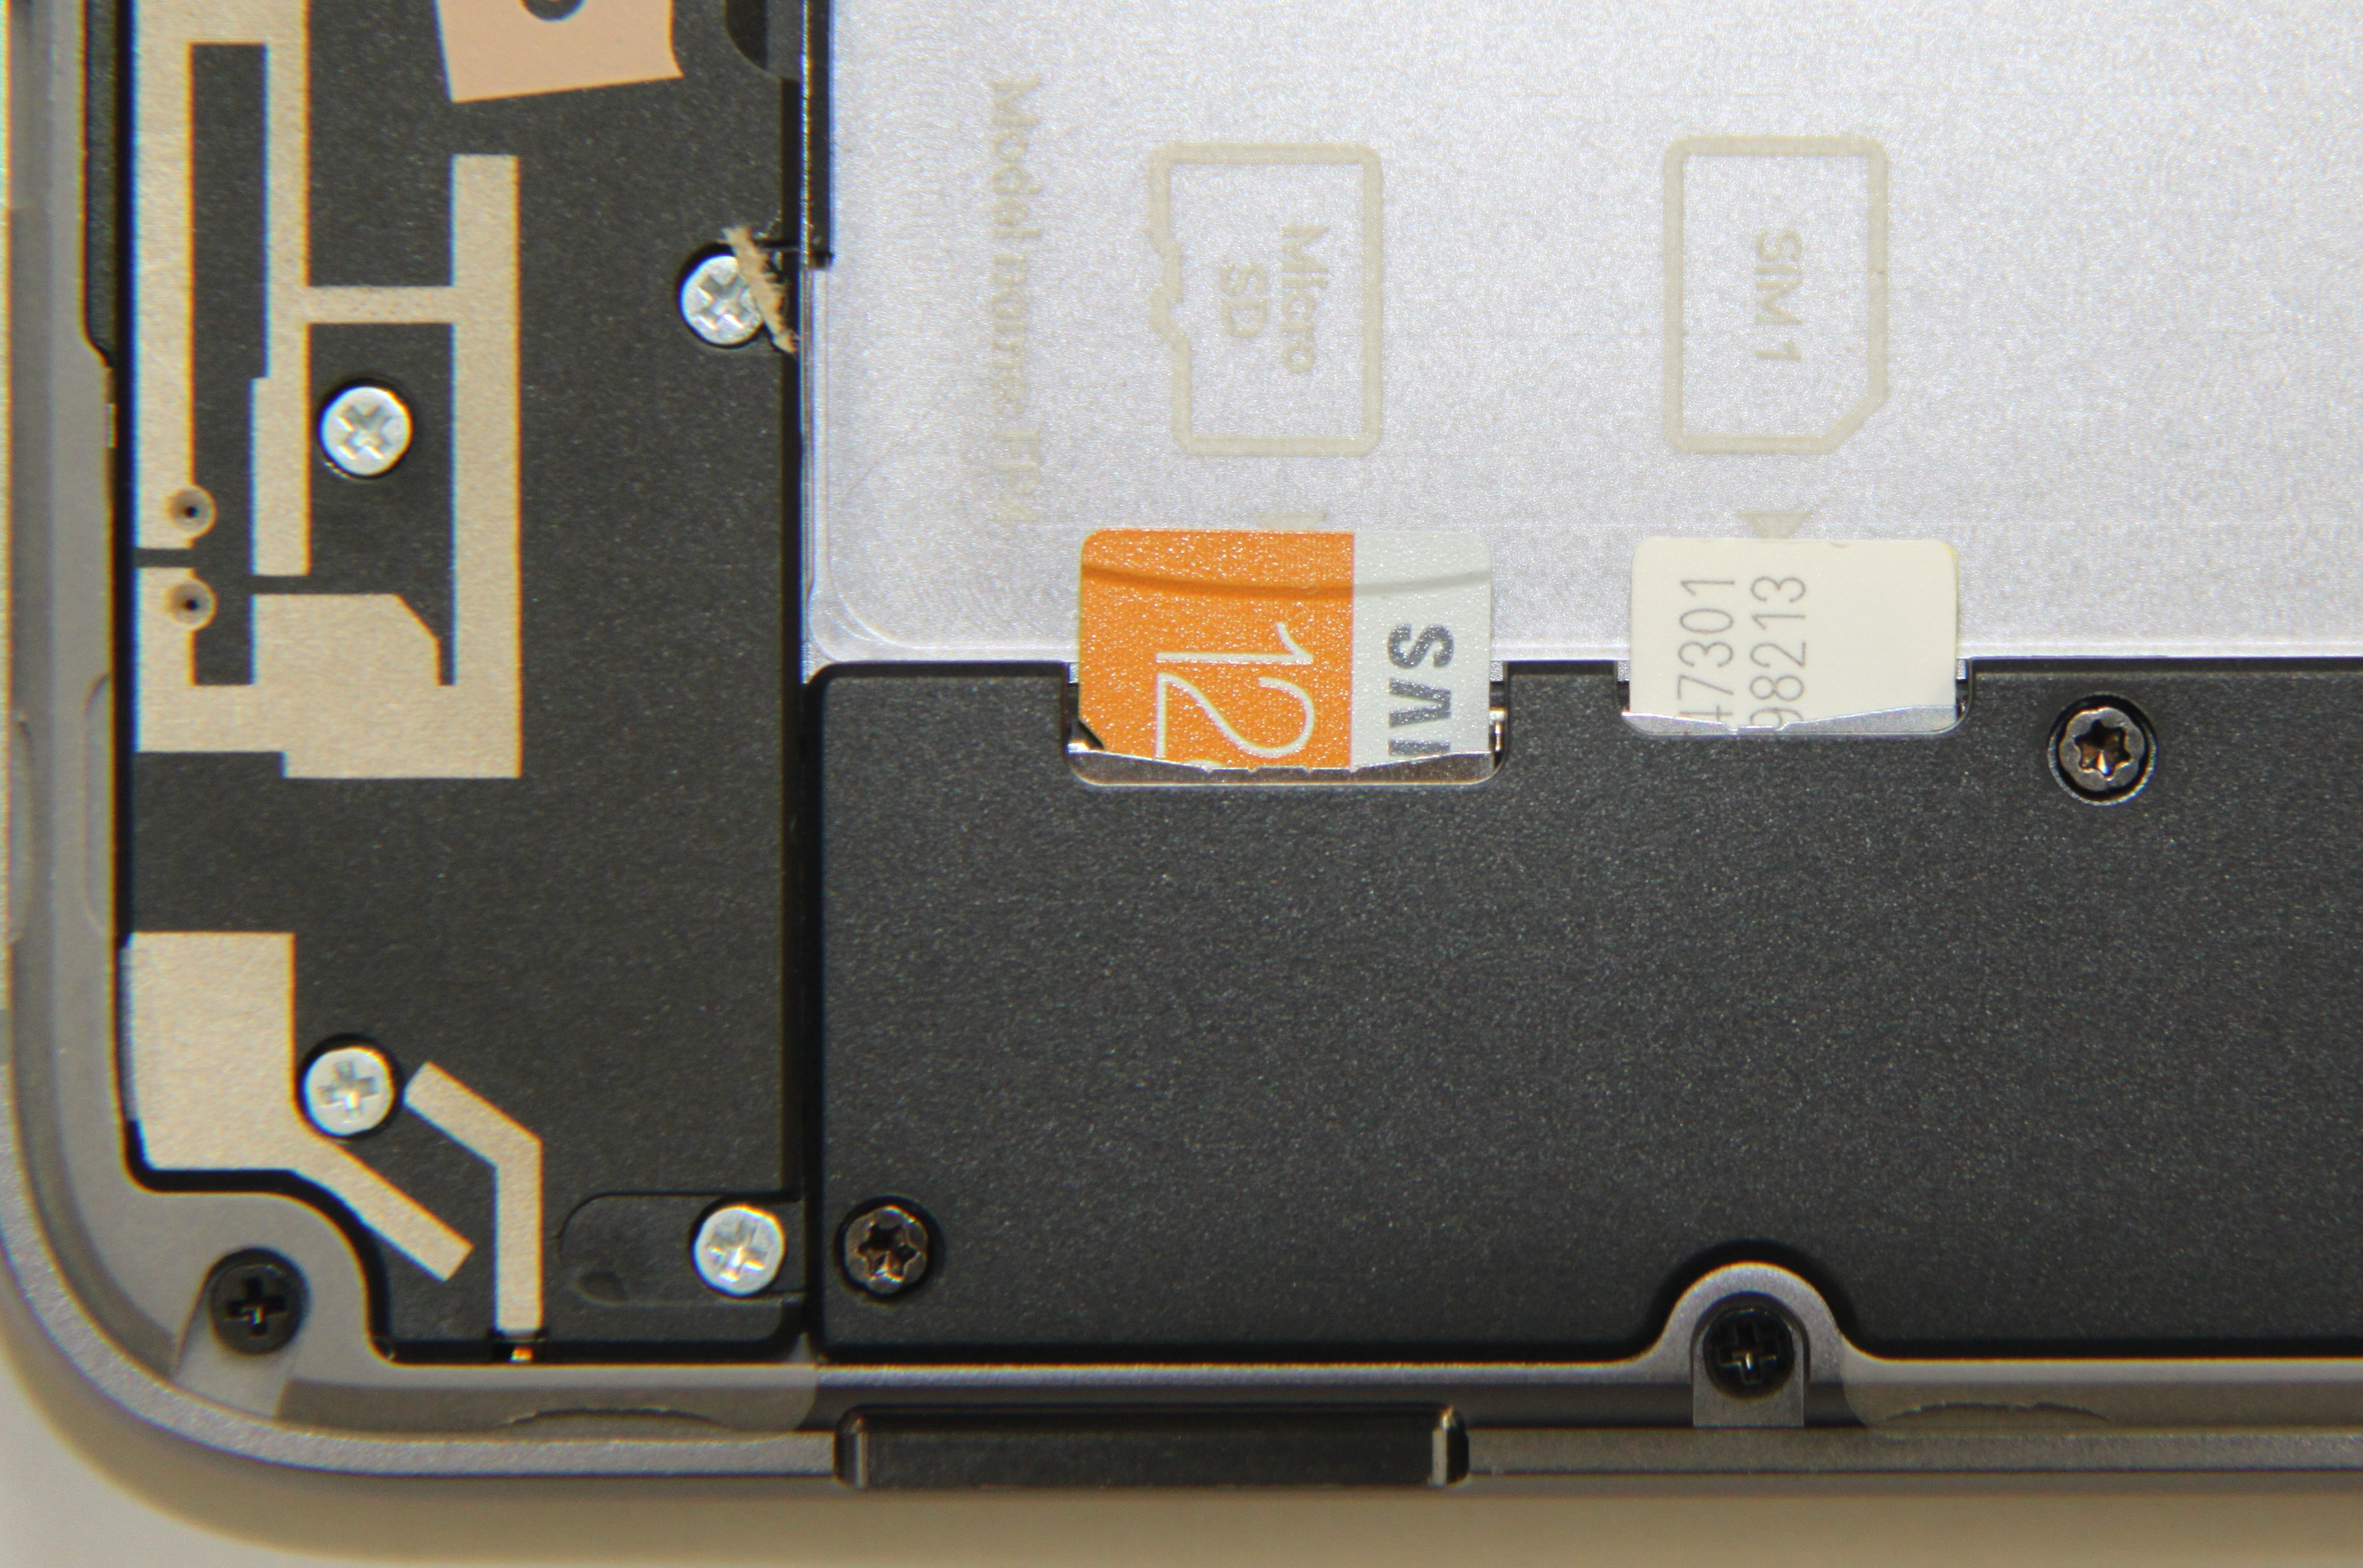
With the battery removed, the SIM and Micro SD slots are exposed on the right hand side of the battery compartment (looking at the back of the phone). Both slots are clearly labelled. The slots are spring loaded and the cards need to be pushed in until they click.
Figure 2. SIM and Micro SD slots

To remove a card, push it slightly further in to the slot to release the catch and the card will spring out slightly and can then be removed.
Setup Wizard
The setup wizard is launched when the phone is first powered on or following a factory reset.
This section describes minimal use of set up the wizard to set the phone up as simply and quickly as possible. As the wizard progresses, various options are presented. The choices made determine how the wizard subsequently progresses and what further options are presented. Any options not chosen during the setup wizard can be chosen later from the "settings" application.
On all the main screens displayed by the setup wizard there is a left pointing triangle that can be tapped to go back a step. On some screens a down pointing triangle is displayed for a drop down menu or to return from a specific option.
On the setup screens, some items of text are highlighted or coloured and these can be tapped to select various options. Although these items of text are not presented as buttons, they function as such and are referred to as buttons in this document.
Hello
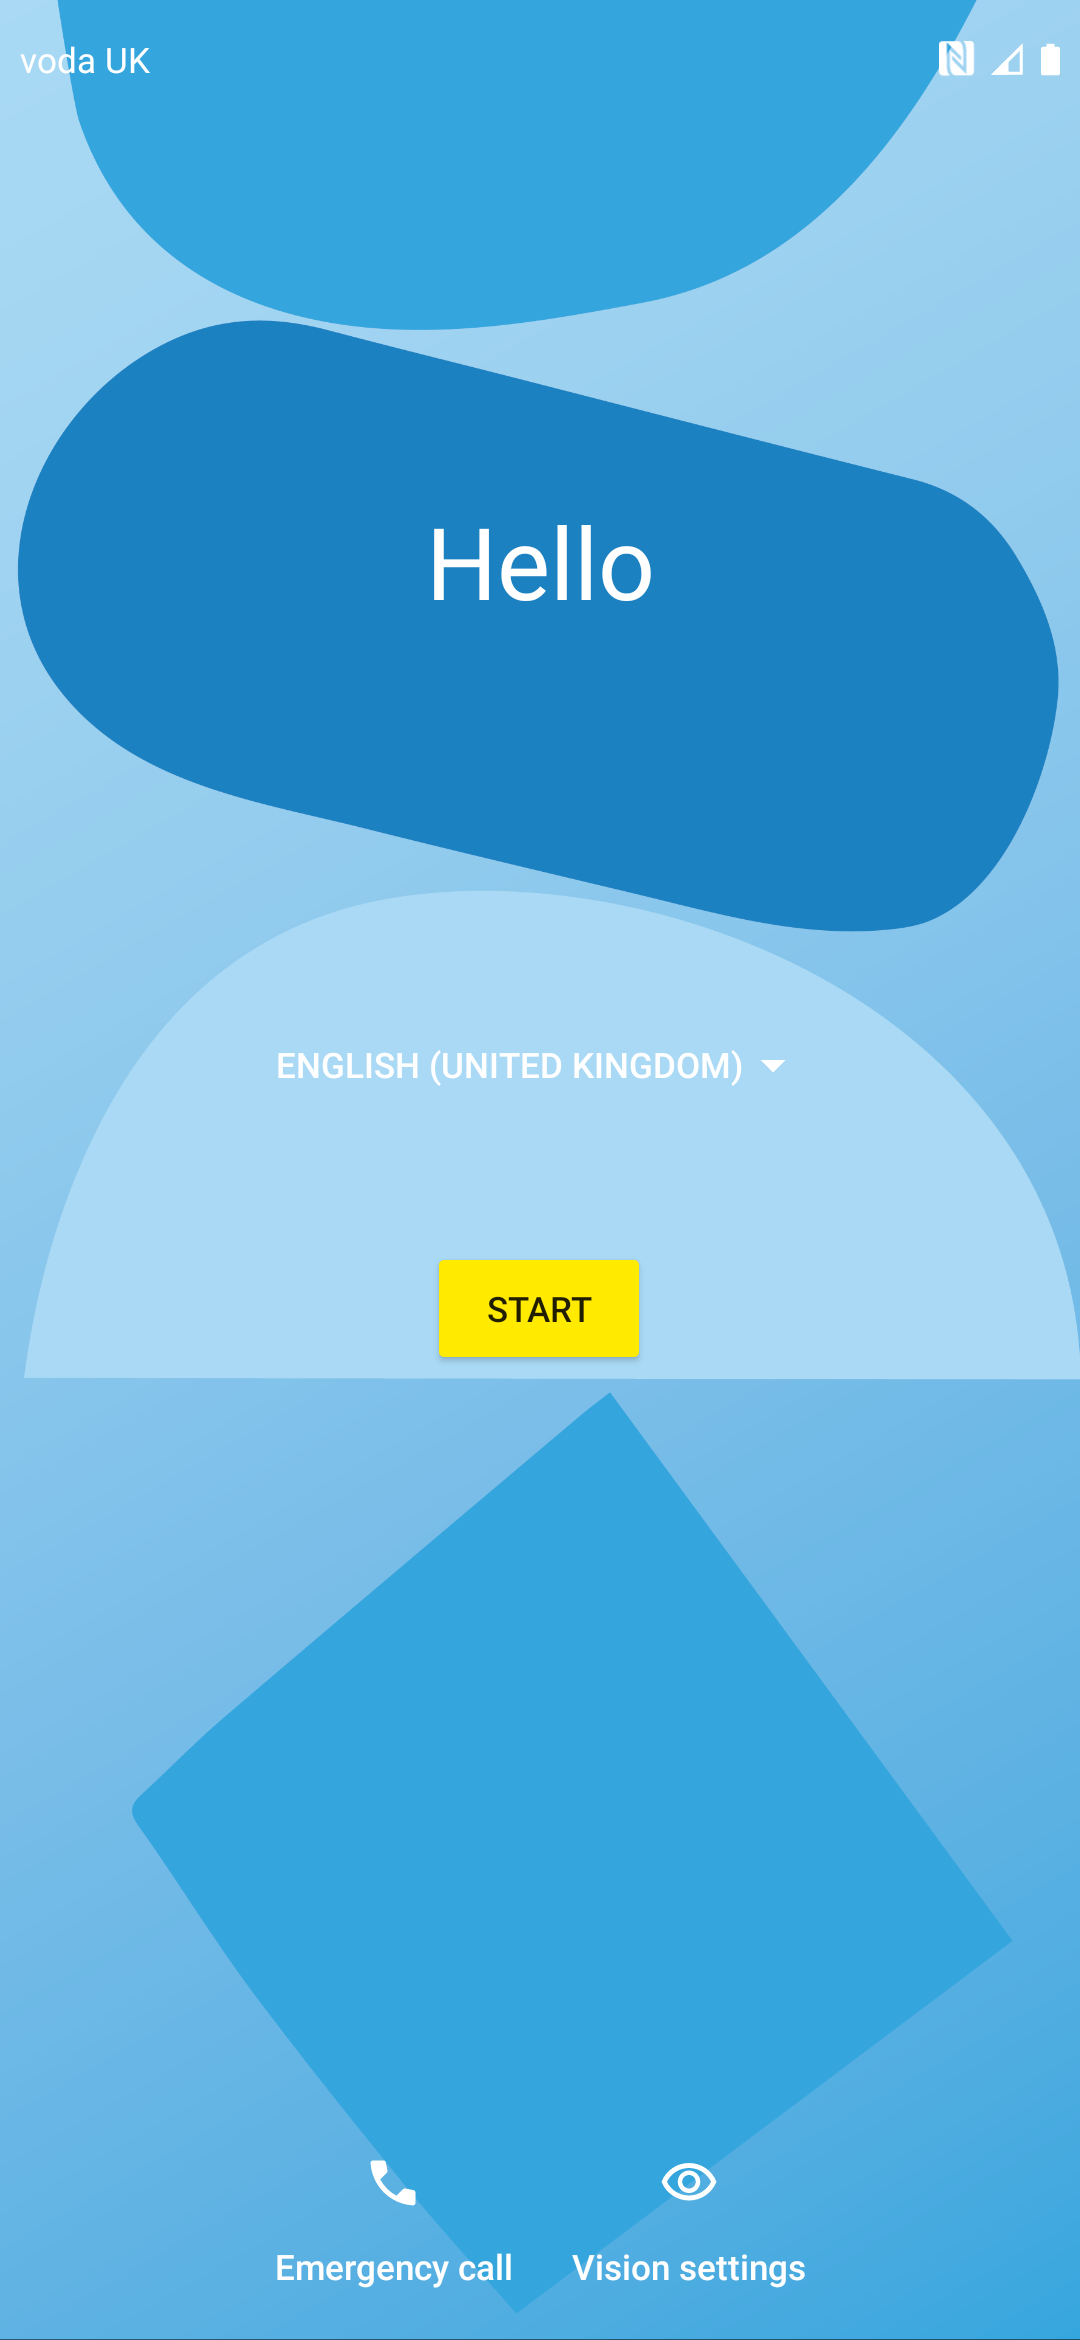
The first screen is shown saying "Hello"
A drop down language menu is shown, with the default language displayed (depending upon how and where the phone was purchased). E.g.
ENGLISH (UNITED KINGDOM)
Below the drop down menu is the word "START" highlighted in yellow.
At the bottom of the screen are options for "Emergency call" and "Vision settings" (with icons above).
To change the language, tap the language drop down menu. A scrollable list, titled "Choose your language" is displayed. At the top, under "Suggested" is the default language followed by "All languages" and the list of available languages in alphabetical order. Tap the required language. To cancel, either tap the "" word or tap the back triangle symbol.
Once the language has been set, tap the "" button.
Figure 3. Hello

WiFi
A screen is shown titled:
Connect to Wi-Fi
Select a network
A list is shown of networks found. At the bottom of the screen is an option to "Set up offline" which skips the Wi-Fi set up. To set up the phone as simply and quickly as possible, tap the "Set up offline" button. Wi-Fi can be set up from the "settings" application later.
If the option "Set up offline" is chosen, a confirmation screen pops up titled "Set up offline?" and explaining what can not be done at this stage without a connection. At the bottom of the pop-up screen two buttons are shown "" (to return to the Wi-Fi set up screen) and "" to proceed without Wi-Fi. For the fastest setup tap "".
Date and time
A screen is shown titled:
Date and time
Adjust if needed.
Three drop down menus are presented for the time zone, date and time respectively. The default time zone is displayed (depending upon how and where the phone was purchased). E.g.
British Summer Time V
GMT +01:00
Tapping the time zone menu brings up a pop up screen titled "Date and time" showing a scrollable list of time zones in alphabetical order. Tap the desired time zone or the back triangle.
Tapping the date menu brings up a pop up screen showing a calendar. Navigate to the desired date if necessary. At the bottom of the pop up screen are buttons to "" and "OK".
Tapping the time menu brings up a pop up screen showing a form of clock that can be used to set the time. At the bottom of the pop up screen are buttons to "" and "".
Figure 4. Clock

Tap the "" button at the bottom of the "Date and time" screen to continue.
A screen is shown titled:
Google Services
Tap to find out more about each service, such as how
to turn it on or off later. Data will be used according to
Google's Privacy Policy.
If Wi-Fi was set up and you signed in to Google, your account will be shown under "Google Services". "Privacy Policy" is highlighted in blue and can be tapped for more info.
A scrollable list of options that can be toggled is shown. Each option has a detailed text description with a down V to show more info. If Wi-Fi has not been enabled, the options shown are as follows:
Location
-
Use location (default on)
-
Allow scanning (default on)
Device maintenance
-
Send usage and diagnostic data (default on)
-
Install updates and apps
Tap "More" or scroll to see more options
Once scrolled to the bottom of the list, an "Accept" button is shown, Tap to accept and proceed.
A screen may be shown title "Just a sec..."
Screen lock
A screen is shown titled:
Set screen lock
For security, set PIN
A field to enter a PIN is shown. The text below says "PIN must be at least 4 digits". Below is a button "Screen lock options".
Two buttons are shown "Skip" and "Next" enabled as appropriate. Below is a key pad.
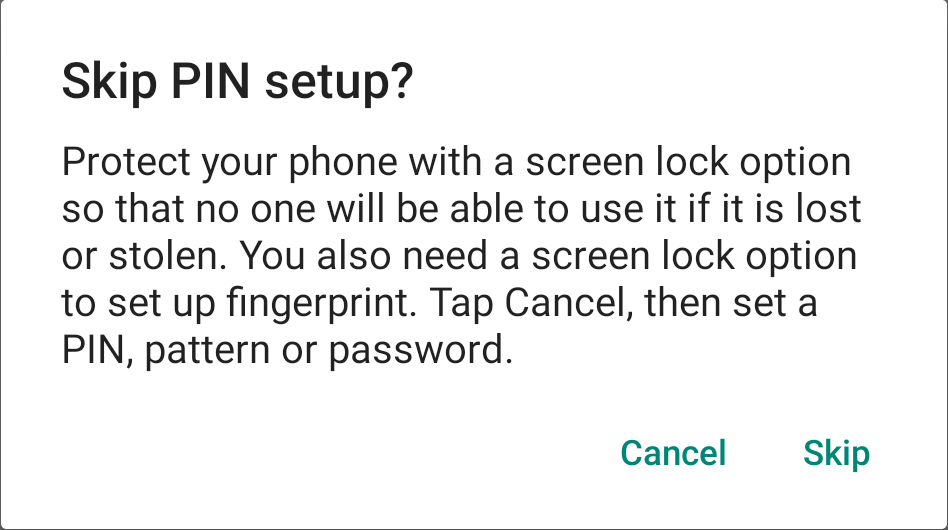
If the "Skip" options is tapped, a confirmation dialogue titled "Skip PIN setup?" is shown with options to "" and "". A screen lock can be set up later from the "settings" application.
Figure 5. Skip PIN

A screen may be shown title "Just a sec..."
Warranty
A screen is be shown titled:
Extended Warranty
Remember to register your Fairphone 4
extended warranty
Below is shown a "Warranty reminder" that can be toggled. Tap the "" button at the bottom of the screen to continue.
Feedbak
A screen is be shown titled:
Sharing is caring
We’d like to know what we can do to keep
improving your Fairphone
Two options are shown that can be toggled:
Invite to give feedback (default on)
Share diagnostic data (default off)
Tap the "" button at the bottom of the screen to continue.
Thank you
A screen is shown titled:
Thank you
Enjoy your Fairphone
Tap the "" button to continue.
The default screen is shown.
Further information
Help, How-to’s and tutorials can be found on the Support web page at: